At command prompt type debug
you will get a - prompt where you can type the fallowing ( means hit enter, not type enter*)
A
MOV AX,0
MOV AX,CX
OUT 70,AL
MOV AX,0
OUT 71,AL
INC CX
CMP CX,100
JB 103
INT 20
just hit enter on this line
G
Q
Basic BIOS password crack - works 9.9 times out of ten
This is a password hack but it clears the BIOS such that the next time you start the PC, the CMOS does not ask for any password. Now if you are able to bring the DOS prompt up, then you will be able to change the BIOS setting to the default. To clear the CMOS do the following:
Get DOS prompt and type:
DEBUG hit enter
-o 70 2e hit enter
-o 71 ff hit enter
-q hit enter
exit hit enter
Restart the computer. It works on most versions of the AWARD BIOS.
Accessing information on the hard disk
When you turn on the host machine, enter the CMOS setup menu (usually you have to press F2, or DEL, or CTRL+ALT+S during the boot sequence) and go to STANDARD CMOS SETUP, and set the channel to which you have put the hard disk as TYPE=Auto, MODE=AUTO, then SAVE & EXIT SETUP. Now you have access to the hard disk.
Standard BIOS backdoor passwords
The first, less invasive, attempt to bypass a BIOS password is to try on of these standard manufacturer's backdoor passwords:
AWARD BIOS
AWARD SW, AWARD_SW, Award SW, AWARD PW, _award, awkward, J64, j256, j262, j332, j322, 01322222, 589589, 589721, 595595, 598598, HLT, SER, SKY_FOX, aLLy, aLLY, Condo, CONCAT, TTPTHA, aPAf, HLT, KDD, ZBAAACA, ZAAADA, ZJAAADC, djonet, %øåñòü ïpîáåëîâ%, %äåâÿòü ïpîáåëîâ%
AMI BIOS
AMI, A.M.I., AMI SW, AMI_SW, BIOS, PASSWORD, HEWITT RAND, Oder
Other passwords you may try (for AMI/AWARD or other BIOSes)
LKWPETER, lkwpeter, BIOSTAR, biostar, BIOSSTAR, biosstar, ALFAROME, Syxz, Wodj
Note that the key associated to "_" in the US keyboard corresponds to "?" in some European keyboards (such as Italian and German ones), so -- for example -- you should type AWARD?SW when using those keyboards. Also remember that passwords are Case Sensitive. The last two passwords in the AWARD BIOS list are in Russian.
Flashing BIOS via software
If you have access to the computer when it's turned on, you could try one of those programs that remove the password from the BIOS, by invalidating its memory.
However, it might happen you don't have one of those programs when you have access to the computer, so you'd better learn how to do manually what they do. You can reset the BIOS to its default values using the MS-DOS tool DEBUG (type DEBUG at the command prompt. You'd better do it in pure MS-DOS mode, not from a MS-DOS shell window in Windows). Once you are in the debug environment enter the following commands:
AMI/AWARD BIOS
O 70 17
O 71 17
Q
PHOENIX BIOS
O 70 FF
O 71 17
Q
GENERIC
Invalidates CMOS RAM.
Should work on all AT motherboards
(XT motherboards don't have CMOS)
O 70 2E
O 71 FF
Q
Note that the first letter is a "O" not the number "0". The numbers which follow are two bytes in hex format.
Flashing BIOS via hardware
If you can't access the computer when it's on, and the standard backdoor passwords didn't work, you'll have to flash the BIOS via hardware. Please read the important notes at the end of this section before to try any of these methods.
Using the jumpers
The canonical way to flash the BIOS via hardware is to plug, unplug, or switch a jumper on the motherboard (for "switching a jumper" I mean that you find a jumper that joins the central pin and a side pin of a group of three pins, you should then unplug the jumper and then plug it to the central pin and to the pin on the opposite side, so if the jumper is normally on position 1-2, you have to put it on position 2-3, or vice versa). This jumper is not always located near to the BIOS, but could be anywhere on the motherboard.
To find the correct jumper you should read the motherboard's manual.
Once you've located the correct jumper, switch it (or plug or unplug it, depending from what the manual says) while the computer is turned OFF. Wait a couple of seconds then put the jumper back to its original position. In some motherboards it may happen that the computer will automatically turn itself on, after flashing the BIOS. In this case, turn it off, and put the jumper back to its original position, then turn it on again. Other motherboards require you turn the computer on for a few seconds to flash the BIOS.
If you don't have the motherboard's manual, you'll have to "brute force" it... trying out all the jumpers. In this case, try first the isolated ones (not in a group), the ones near to the BIOS, and the ones you can switch (as I explained before). If all them fail, try all the others. However, you must modify the status of only one jumper per attempt, otherwise you could damage the motherboard (since you don't know what the jumper you modified is actually meant for). If the password request screen still appear, try another one.
If after flashing the BIOS, the computer won't boot when you turn it on, turn it off, and wait some seconds before to retry.
Removing the battery
If you can't find the jumper to flash the BIOS or if such jumper doesn't exist, you can remove the battery that keeps the BIOS memory alive. It's a button-size battery somewhere on the motherboard (on elder computers the battery could be a small, typically blue, cylinder soldered to the motherboard, but usually has a jumper on its side to disconnect it, otherwise you'll have to unsolder it and then solder it back). Take it away for 15-30 minutes or more, then put it back and the data contained into the BIOS memory should be volatilized. I'd suggest you to remove it for about one hour to be sure, because if you put it back when the data aren't erased yet you'll have to wait more time, as you've never removed it. If at first it doesn't work, try to remove the battery overnight.
Important note: in laptop and notebooks you don't have to remove the computer's power batteries (which would be useless), but you should open your computer and remove the CMOS battery from the motherboard.
Short-circuiting the chip
Another way to clear the CMOS RAM is to reset it by short circuiting two pins of the BIOS chip for a few seconds. You can do that with a small piece of electric wire or with a bent paper clip. Always make sure that the computer is turned OFF before to try this operation.
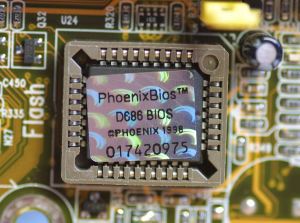
Here is a list of EPROM chips that are commonly used in the BIOS industry. You may find similar chips with different names if they are compatible chips made by another brand. If you find the BIOS chip you are working on matches with one of the following you can try to short-circuit the appropriate pins. Be careful, because this operation may damage the chip.
CHIPS P82C206 (square)
Short together pins 12 and 32 (the first and the last pins on the bottom edge of the chip) or pins 74 and 75 (the two pins on the upper left corner).
gnd
74
|__________________
5v 75--| |
| |
| |
| CHIPS |
1 * | |
| P82C206 |
| |
| |
|___________________|
| |
| gnd | 5v
12 32
OPTi F82C206 (rectangular)
Short together pins 3 and 26 (third pin from left side and fifth pin from right side on the bottom edge).
80 51
|______________|
81 -| |- 50
| |
| |
| OPTi |
| |
| F82C206 |
| |
100-|________________|-31
|| | |
1 || | | 30
3 26
Dallas DS1287, DS1287A
Benchmarq bp3287MT, bq3287AMT
The Dallas DS1287 and DS1287A, and the compatible Benchmarq bp3287MT and bq3287AMT chips have a built-in battery. This battery should last up to ten years. Any motherboard using these chips should not have an additional battery (this means you can't flash the BIOS by removing a battery). When the battery fails, the RTC chip would be replaced.
CMOS RAM can be cleared on the 1287A and 3287AMT chips by shorting pins 12 and 21.
The 1287 (and 3287MT) differ from the 1287A in that the CMOS RAM can't be cleared. If there is a problem such as a forgotten password, the chip must be replaced. (In this case it is recommended to replace the 1287 with a 1287A). Also the Dallas 12887 and 12887A are similar but contain twice as much CMOS RAM storage.
__________
1 -| * U |- 24 5v
2 -| |- 23
3 -| |- 22
4 -| |- 21 RCL (RAM Clear)
5 -| |- 20
6 -| |- 19
7 -| |- 18
8 -| |- 17
9 -| |- 16
10 -| |- 15
11 -| |- 14
gnd 12 -|__________|- 13
NOTE: Although these are 24-pin chips,
the Dallas chips may be missing 5 pins,
these are unused pins.
Most chips have unused pins,
though usually they are still present.
Dallas DS12885S
Benchmarq bq3258S
Hitachi HD146818AP
Samsung KS82C6818A
This is a rectangular 24-pin DIP chip, usually in a socket. The number on the chip should end in 6818.
Although this chip is pin-compatible with the Dallas 1287/1287A, there is no built-in battery.
Short together pins 12 and 24.
5v
24 20 13
|___________|____________________|
| |
| DALLAS |
|> |
| DS12885S |
| |
|__________________________________|
| |
1 12
gnd
Motorola MC146818AP
Short pins 12 and 24. These are the pins on diagonally opposite corners - lower left and upper right. You might also try pins 12 and 20.
__________
1 -| * U |- 24 5v
2 -| |- 23
3 -| |- 22
4 -| |- 21
5 -| |- 20
6 -| |- 19
7 -| |- 18
8 -| |- 17
9 -| |- 16
10 -| |- 15
11 -| |- 14
gnd 12 -|__________|- 13
Replacing the chip
If nothing works, you could replace the existing BIOS chip with a new one you can buy from your specialized electronic shop or your computer supplier. It's a quick operation if the chip is inserted on a base and not soldered to the motherboard, otherwise you'll have to unsolder it and then put the new one. In this case would be more convenient to solder a base on which you'll then plug the new chip, in the eventuality that you'll have to change it again. If you can't find the BIOS chip specifically made for your motherboard, you should buy one of the same type (probably one of the ones shown above) and look in your motherboard manufacturer's website to see if there's the BIOS image to download. Then you should copy that image on the chip you bought with an EPROM programmer.
Important
Whether is the method you use, when you flash the BIOS not only the password, but also all the other configuration data will be reset to the factory defaults, so when you are booting for the first time after a BIOS flash, you should enter the CMOS configuration menu (as explained before) and fix up some things.
Also, when you boot Windows, it may happen that it finds some new device, because of the new configuration of the BIOS, in this case you'll probably need the Windows installation CD because Windows may ask you for some external files. If Windows doesn't see the CD-ROM try to eject and re-insert the CD-ROM again. If Windows can't find the CD-ROM drive and you set it properly from the BIOS config, just reboot with the reset key, and in the next run Windows should find it. However most files needed by the system while installing new hardware could also be found in C:WINDOWS, C:WINDOWSSYSTEM, or C:WINDOWSINF .
Key Disk for Toshiba laptops
Some Toshiba notebooks allow to bypass BIOS by inserting a "key-disk" in the floppy disk drive while booting. To create a Toshiba Keydisk, take a 720Kb or 1.44Mb floppy disk, format it (if it's not formatted yet), then use a hex editor such as Hex Workshop to change the first five bytes of the second sector (the one after the boot sector) and set them to 4B 45 59 00 00 (note that the first three bytes are the ASCII for "KEY" followed by two zeroes). Once you have created the key disk put it into the notebook's drive and turn it on, then push the reset button and when asked for password, press Enter. You will be asked to Set Password again. Press Y and Enter. You'll enter the BIOS configuration where you can set a new password.
Key protected cases
A final note about those old computers (up to 486 and early Pentiums) protected with a key that prevented the use of the mouse and the keyboard or the power button. All you have to do with them is to follow the wires connected to the key hole, locate the jumper to which they are connected and unplug it.
That's all.
Clear Cmos, jumper.That is the way how I solve problem when customer forgets password.
More
There are a few different ways to reset the cmos, here's a few:
1. there are many default common passwords,
such as:
At boot-up note the BIOS provider (Award, AMI, Phoenix, IBM, etc.)
For Award BIOS' try these backdoor passwords:
AWARD_SW
j262
HLT
SER
SKY_FOX
BIOSTAR
ALFAROME
Lkwpeter
j256
AWARD?SW
LKWPETER
syxz
ALLy
589589
589721
awkward
CONCAT
d8on
CONDO
j64
szyx
For AMI BIOS' try these backdoor passwords:
AMI
BIOS
PASSWORD
HEWITT RAND
AMI?SW
AMI_SW
LKWPETER
A.M.I.
CONDO
For PHOENIX BIOS' try this backdoor password:
phoenix
there are too many to count here's a list
http://www.phenoelit.de/dpl/dpl.html
(search for PC BIOS)
2. On some older PC's pressing the insert key upon startup will clear
the CMOS, make sure you hold it down till it's done booting.
3. Another way which we pretty much already covered, was to pull the
metallic nickel looking battery that supplies power to the CMOS.
4. Some times there is a small three pin jumper used to reset the bios,
just move the black little pin cover to the opposite two pins.
(Make sure to read the motherboards manual before this)
5. If the battery is soldered in you can take a soldering iron to it but
I don't recommend it unless you are a professional.